 |
|
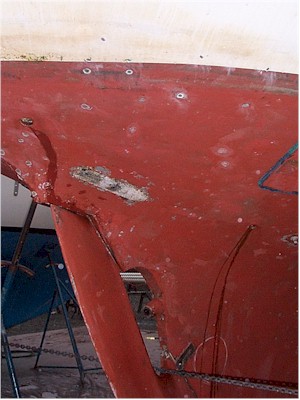
A few of our 60 blisters |
|
|
|
A few of our 60 blisters |
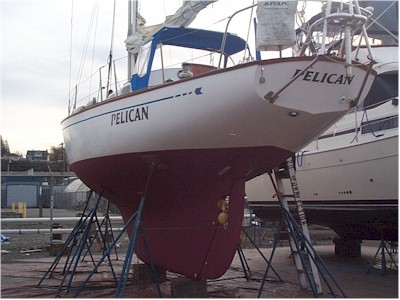
During the survey of Pelican, we noted that the stuffing box was dripping a bit fast (i.e. approximately 20 drops per minute) and noted that either repacking or tightening down the packing nut was in order.
Before our trip from Port Townsend to Port of Everett boat yard to refresh our bottom paint, we attempted to tighten down the packing nut to slow the dripping. After the first few turns, the corroded nut cracked and the dripping increased! Alas, another project to tackle at the yard - unfortunately this one entailed shaft removal on a very rusty, but running, 1970’s era 13 hp Volvo.
As we backed out of our slip the morning of our sail to Port Townsend we realized how little 13 hp really is on a 16,000 pound full keel sailboat. We were barely able to stop the boats momentum of less than a knot with a black-smoke-full-throttle-forward-thrust to avoid backing into the dock across the fairway! What would that be like in a heavy current such as those we’d encountered at the Petersburg, Alaska marina? Ah well, we figured, we would get used to the feel of her underpowered-ness and become better boat handlers in the process.
We were lucky to have good winds most of the way to the Port of Everett yard, only having to start up the Volvo to get out of the breakwater in Port Townsend and into the river and guest dock at Everett. One thing we also noticed during the short runs at full throttle (5 knots boat speed) was considerable vibration from below foot. Upon further inspection, it became obvious that the engine was WAY out of alignment with two of the four engine mounts frighteningly loose on the stringers. That would also need attention.
Shortly after Pelican settled into her boatstands, we ground out approximately 60 of the larger, weeping blisters on her hull, so they would dry out over the next month or so. We would then fill them in with epoxy and sand them fair.
 |
|
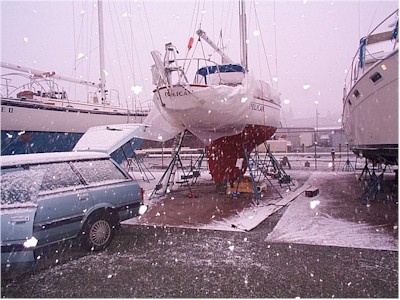
Gotta love the boatyard in January |
Once in the yard, it was time to go to work on removing the propeller shaft so that we could remove the cracked stuffing box. Removal of the shaft from the extremely corroded coupling was a bear to say the least! We followed the coupling-shaft separation advice from Don Casey’s Good Old Boat using a socket as a spacer and the coupler bolts as a clamp to press out the shaft. After many bruises from working in the cramped bilge spaces and much cursing, the shaft was free! At first glance, it became obvious that the 7/8” shaft would also need replacement – it had become extremely worn in one area due to engine misalignment.
After some research and advice from a friend who once worked at PYI we decided that a PSS drip-less packing was to replace our old cracked stuffing box. After consulting with the Prop-Shop we decided to replace our old 7/8” diameter shaft with a 1” diameter variety which is a more common standard. This also meant boring out the old propeller shaft taper so that it would fit on the new shaft. The Prop-Shop cut us a new 1” shaft, fit and faced it with a new Volvo coupler, sold us a new 1.5” O.D. cutlass bearing and bored and re-balanced our old 2-blade prop. We were ready to begin putting things back together!
 |
|
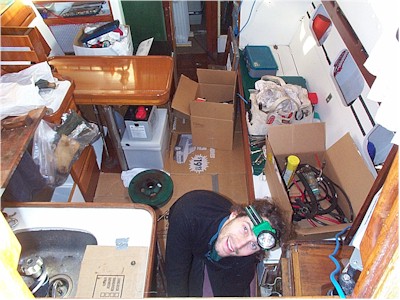
Boatyard work is messy too |
After some measurements, we found that the inside protrusion of our shaft log was 1.25” I.D. and 1.5” O.D. while the outside protrusion was 1.5” I.D. and 2” O.D. At some point (possibly during the last engine installation) a previous owner had extended the inside portion of our shaft log using a smaller fiberglass shaft log tube. They had used a LOT of epoxy and very little glass to secure the inside portion to the hull but it looked suitable – at this point, the thought of boring out the old shaft log and installing a new one-piece fiberglass tube seemed too much and unnecessary. We decided to leave it be for now.
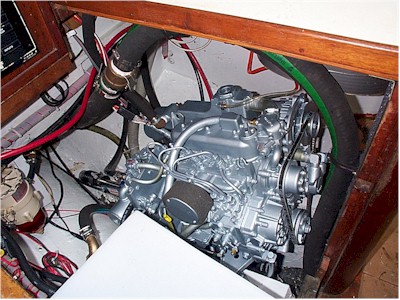
One day in late December 2001, we were huddling over the engine trying to decide how to fix the engine misalignment situation when the whole mess just hit us like a falling brick. This nearly 30 year old raw water cooled engine was becoming a ball of rust and we’d better take it out and rebuild it or replace it with a new engine else we may be plagued with problems down the road while cruising and living off savings. On the drive home from Port of Everett boat yard that evening we decided we would take the plunge and buy a new engine, this time fresh water cooled and preferably a Yanmar like we had on Jenny P.
 |
|
Gorgeous new Universal M-25XPB! |
In the end, the installation of our new Universal M-25XPB went flawlessly, although a bit of blood and sweat was shed during the process. See our Repowering project log for all the gory details.
After finishing up our blister repairs, replacing an old thru-hull, replacing the zincs and painting the bottom, we were ready to splash! The morning of February 10th, we were back in the water and engaging the engine in forward for the first time. All went well – no unusual vibrations and TONS of power compared to the old Volvo. Our 30 mile trip to Shilshole Bay Marina was uneventful except for the 25 to 30 knot winds and 3 to 4 foot chop we were bucking into under power at 6.5 knots with only 2000 of a possible 2800 RPM’s!
The week after arriving at Shilshole, we re-checked the engine alignment as is recommended by multiple authorities due to hull flex and settling. To our amazement, the alignment was virtually unchanged and easy to check this time due to the colored bolt on the R&D flex coupling which eliminates the need to unbolt and align the hard couplings as was necessary during the original alignment. To our dismay however, we found that water was still present in the area around where the stern tube enters the interior of the boat near where the PSS seal bellows attach.
 |
|
Ready for launch!!! |
Water was not entering where the PSS seal bellows were hose clamped to the shaft log, but around where the shaft log itself was epoxied to the hull! If you recall from earlier in this log we had discovered upon haul out and disassembly of our old stuffing box that there were two different shaft logs epoxied together sometime during the last engine replacement during the 1970’s. The joint between these two shaft logs had failed and begun to leak possibly years ago but was undetectable due to the old leaking stuffing box in that area. We had bad feelings about this joint before and regretted not having replaced the shaft log while in the Port of Everett boat yard.
Our first solution was to attempt a two part emergency epoxy putty fix. We spent an afternoon with the Dremel tool grinding down the edges of the joint then forcing putty into the dribbling crack to no avail… the water kept coming! So, with much dismay, we came to the realization that another haul out was inevitable. This time we would do it right! All that was required was to remove the prop and shaft, grind out the old two part stern tube, temporarily re-install the shaft without the flex coupling or PSS seal, install a cutlass bearing in a new one-piece shaft log and slide it onto the temporarily re-installed shaft to align the new tube, glass the new shaft log in place on the inside and outside of the hull, and install the shaft once again with the PSS seal and flex coupling and that’s it! Good for another 30 years or longer. We’ll see how that goes….
We hauled out at Seaview West boatyard here at Shilshole and spent four days grinding out the old stern tube and epoxy/glassing in a new one. Amazingly, the haulout fees were the most expensive part of this project (other than the Whale foot pump we discovered was broken and decided to replace since we had already rebuilt it). This little project went so smoothly we were really bummed we had not done it up at the Everett yard (which would have saved us $400). Important lesson learned: if you know something's broke -- fix it.
We are now back in the water and happily our bilge is bone dry. We're ready to do some Spring sailing and get wet.